Conflicts
This section will guide you through conflicts in Git. The guide is based on the workflow proposed earlier and the method for solving conflicts uses commits. There are other methods for solving conflicts and although this can be seen as creating an overhead with commits and merges it is non destructive method that is suitable when collaborating on repositories.
Identifying conflicts
When pushing code you sometimes have conflicts. In the command line and some GUI clients you will usually get a message that the push cannot be finished.
 ! [rejected]        master -> master (fetch first)
error: failed to push some refs to '***'
hint: Updates were rejected because the remote contains work that you do
hint: not have locally. This is usually caused by another repository pushing
hint: to the same ref. You may want to first integrate the remote changes
hint: (e.g., 'git pull ...') before pushing again.
hint: See the 'Note about fast-forwards' in 'git push --help' for details.
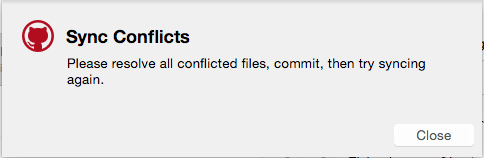
In some clients another message might popup. In the GitHub client the message looks like this.
Solving conflicts
When a conflict message appears it tells you that you need to integrate the remote changes before pushing. To do this you can do a pull request. When doing the pull request the command line and most graphical clients will tell you what files the conflict resides in. When working in the command line it might look like this.
remote: Counting objects: 12, done.
[...]
   5303a6e..2e70709  master     -> origin/master
Auto-merging <file>
CONFLICT (content): Merge conflict in <file>
Automatic merge failed; fix conflicts and then commit the result.
When the conflict occured Git stops the merge of the remote files in your workspace and asks you to fix the conflict. To solve the conflict you can use some different tools and methods. Some of them are explained below.
Command line (mergetool)
If you work with the command line you can use the mergetool. The mergetool uses a tool (opendiff in the example below) that helps you to solve the conflict. To execute mergetool you use the command below. The command will (hopefully) open each of the files that has a conflict and let you choose a solution.
git mergetool
When running the command a tool for solving the conflict will open. The example below shows a tool called opendiff. Depending on your environment other tools may be installed but the principal is the same. You see the difference between the local version (left in image) and the remote version (right in image).
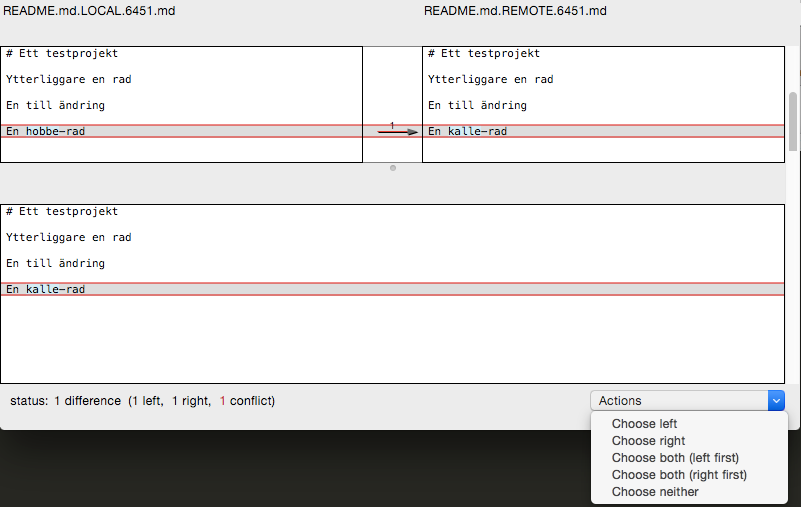
After choosing a solution the file will change accordingly and the change is ready for being commited.
Text editor
When Git identifies a conflict it adds some markup and metadata in the file(s) that has the conflict(s). To fix the conflict in your text editor you need to open the file in which the conflict has appeared. In the file you can find the conflict area by the markup that Git has added.
<<<<<<< HEAD
A change

A new line
=======
I made a new line
>>>>>>> 2e70709b19079c2f34610785aba809b00991e14e
The markup follows a specific pattern.
<<<<<<< <pointer>
<local version>
=======
<pulled version>
>>>>>>> <pulled commit id>
The pointer in this case is HEAD (we don't need to know what HEAD is, just accept that it exists) and the commit id is the id of the pulled commit that causes the conflict. To solve the conflict choose what version of the code you want to keep. Simply delete the code that you do not want to keep (including the Git markup and meta data). After making the changes accordingly you have commit the changes.
Client
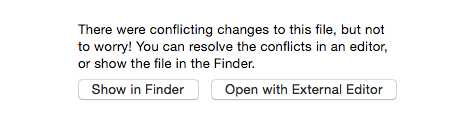
Some graphical clients show you where the conflict has occured and some also give you the option to solve it in the client. Although this might fix many problems it's sometimes neccessary too manually solve the conflict with the command line or a text editor. GitHub helps you by letting you open an external editor to manually solve the conflict.
Some clients has integrated a diff tool and the ability to solve the conflict in the client. E.g. SourceTree has a menu called Actions in which you can automatically solve conflicts directly in the client.
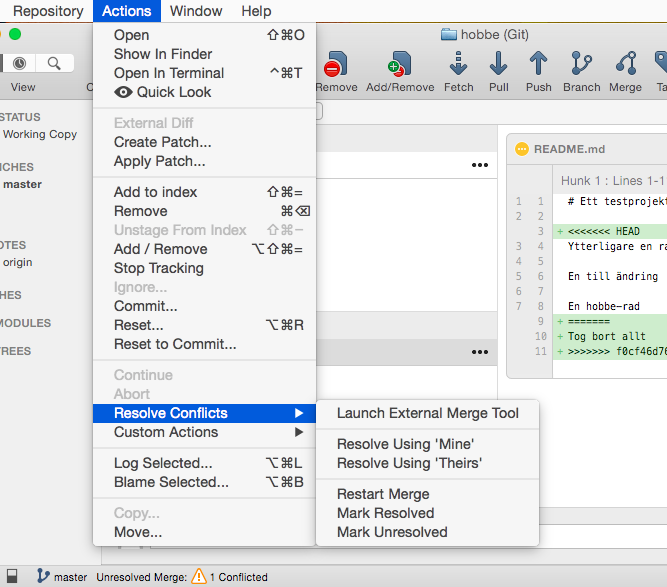
Althoug integrated tools in the client can solve many conflicts it is usually a good principle not too trust the tools too much. Make sure that you know what will happen before letting the tools work for you.
Pushing the solution
When the conflict has been resolved you can make the push and the commits you've made will be added to the central repository. Before pushing you have to make a commit with the solution. The steps for adding files to the staging area, making a commit and then pushing the commits to the central repository should be clear. If not please take a look in the workflow section.