Workflow
In this section you will learn how to work with Git and GitHub. It is assumed that you've created a repository on GitHub and cloned it to your computer. The model described is a centralized workflow where a central repository acts as a single point-of-entry. This section will not cover how to work with branches. Branches are very powerful and useful but will hopefully not be needed in your projects. If you're interested you can read about branching and merging at the Git website
Git
To understand Git and the workflow models that can be used you first need to have an understanding of how Git works. Somewhat simplified (it gives you the understanding you need) your files can be in on of three states in your local environment.
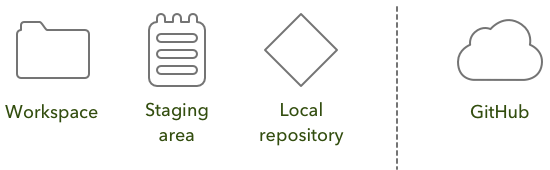
Workspace
Files that are in your workspace are the files that you see on your harddrive and in your editor or IDE. The workspace contains all the files that belong to the project and are editable by you, the user/developer. If you wouldn't be using a version control system one could say that workspace is the only state you work with.
Staging area / index
The staging area contains all the files that should be saved as a new version next time a new version is committed. When a file is added to the staging area a snapshot is made of the file and all changes to the file thereafter will not be added to the snapshot unless you add it again to the staging area.
Local repository
The local repository contains all the changes that have been recorded to the version control system. The system does not contain commits that have been added to the GitHub repository unless you have manually retrieved them from the central repository. The local repository should be a clone of the central repository and also strives to be that.
GitHub
GitHub is the central repository that all project members holds as the main source. The local repository is a clone of the central repository and all changes that are made locally should be synced (pushed) to GitHub. That way everyone has access to the work that the group has done.
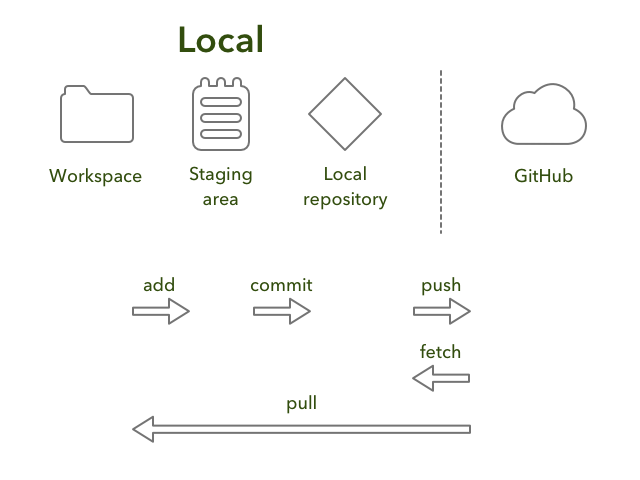
Centralized model
In this model all the changes you do are local until you push them to the central repository on GitHub. While Git is distributed revision control the model explained in this section uses GitHub as a central repository that all collaborators use as the primary source.
There are many other workflow models that can be used. Github explains some other models if you are interested.
Working with source code
When working with your project you write source code. Even if you've never used a version control system before this part isn't any different from how you usually work. The files you work with exist in your workspace.
Commiting changes
When you've written a method, refactored a function or in some way made a change in your code it might be a good idea to save the changes. This is where you start working with Git. If you're satisfied with the revision you add the changes to the staging area. If you use a client with a GUI this part could be automated or just a simple click. But if you use the command line you need to add the file manually. The command for this is the following.
git add <file>
When you execute the command the file, as it looks at the moment, is added to the staging area. If you make any changes to the file after staging them the changes are not reflected in the staging area.
When you've added all the files that you want to commit to the version control system it's time to commit the change. Up to this moment you are able to change what you want to commit but when you commit you should be sure that the changes that you've made are complete. It's easy to retrieve an older version of the source code (it is a version control system after all) but it's good practice to make sure that the commit doesn't break any other code (well duh! of course).
If everything is functional and the files are added to the staging area it's time to commit. In a graphical client it's probably obvious how you create a commit. One important thing (and the hardest part) is to create a commit message. The message should explain why the commit is created. This could be an added function, a bugfix, code refactoring or whatever, just try to explain what you've done (not a novel though). If you use the command line the command for this is the following.
git commit -m "<commit message>"
The option "-m" tells the command that the command message follows. Otherwise a text editor (like Vim or Emacs) will open and you will have to write a message in the editor. Usually this means more keyboard use, more commands and less time coding. So the option "-m" is often a good idea.
Pushing your code
As stated earlier the repository you work on resides locally. If you work in a project where other members need your code you need to push it to GitHub otherwise they can't enjoy the changes you've made. To publish your local changes to the centralized repository you need to push it. In a client with a GUI you probably do this with a push or sync button. The command line style for this is the following.
git push <remote name> <branch>
If you've cloned a GitHub project the remote name is probably origin and since we're not working with branches you probably only have one, master. The command for a push with origin and maste is.
git push origin master
You don't need to specify a remote or branch but it's generally good practice. You can control the behaviour of a push without remote and branch so that it suites your needs or just name the remote and branch. When working with multiple remotes and branches it's nice to have control what you're pushing and where. For more information see the documentation.
Retrieving commits
If you want to find out what your other project members have been up to and merge their code contributions to your work you need to retrieve it from the central repository. In a graphical client this is usually a button that says pull. If you use the command line the command is the following.
git pull <remote name> <branch>
As with the push request the remote name for GitHub probably is origin and the branch you work on is master, unless you've created other branches. The command for this is.
git pull origin master
You don't need to specify a remote or a branch but as with the pull command it's nice to know what's happening. The behaviour of a pull request without remote and branch can be controlled in the config file, as with the push request. For more information see the documentation.